Before getting started with your blog the first thing to do
is a little brainstorm! By now your shop should be up and running and have a
look or theme that is very true to your shop. Remember to keep that consistent
with your blog as well. Brain storm the following key points:
1)
Title – often your shop name, or something
similar and remember it may be taken, so think about how you can modify that
name to still be consistent
2)
Appearance and Layout – Make sure it is
consistent to your shop and your other sites. Think about color schemes and
branding
3)
What to blog about – try to come up with a good
idea of what related things you are going to blog about and how often, keeping
consistent is key!
So now you should have a better idea of what your site will
look like and it is time to get started!
Today we are going to be creating a blog with blogger, which
is run by Google. If you do not have a google / gmail account you can log into www.gmail.com to sign up. There will be an icon on the top right hand
corner that says: “create an account”.
Click on it and continue to fill in all of the information. Once you are
set up or logged in, you can either click on “more” and find “blogger” or you can
go to www.blogger.com.
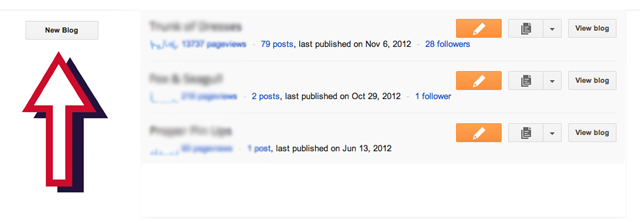
Now that you are on blogger your page should appear
something like this:

*Note I already have a few blogs so those side icons may not
show up for you. The important part is where that arrow is pointing.
Click on the button on the left hand side that says: “New
Blog”.
This screen should then pop up:
There are three easy steps that go as follows:
1)
Type in the title of your blog for example “A
New Start”
2)
Type in what your actual URL address will be for
example “anewstartonline” because “anewstart” was not available. Make sure that
there is a checkmark beside your address and clearly states “This blog address
is available” underneath.
3)
Once you have figured out all of your titles,
just simply click on “create blog” at the bottom!
Once your page is completed there will be an arrow you can
click on which will give you a few options. Click on “Layout”
Now, you are welcome to start with this page but I always
find it more fun to start with the “template designer”.
A screen like this should appear and there will be a few
options for templates. The bottom part that says: “No posts found” is where the
examples will appear to how your site will appear.
On the left hand side there are also some other options to
play with, including font, color, sizing, etc. We will go over all of that
another time (potentially next week) but for now a simple start to a blog is
the goal of this post.
To apply all of the changes you have made please remember to click on “apply to blog” in the upper right hand corner.
Now that your basic set up is complete; it’s time to head
back to the main page by clicking “Back to Blogger”.
Now it’s time to create a small profile so when visitors
come to your site they can find out a little more about you. Click on your name
on the upper right corner and this screen should show up. From there click on
“blogger profile”.
Now that you are on the edit page, feel free to fill in any
of the information that you think would be important for others to know, that
you are also comfortable sharing. Do not share any personal information that
you are not comfortable with!
-Your name
-Your business name
-What you sell / make / create
-Your background (education, experience, skills that make
what you do your passion)
-Anything else you think describes you and your work!
It may also be fun to fill out any of the other boxes so
that your readers can get a better idea of who you are as a person behind your
business! The introduction section will appear on the side of your page when people
visit your site.
It is also a good idea to add an image to your site. This
can either be your logo, an image of your face, or something related to your
business. Just click on “choose file” and upload a picture from your computer.
When you are finished do NOT forget to click on
“save profile”


No comments:
Post a Comment